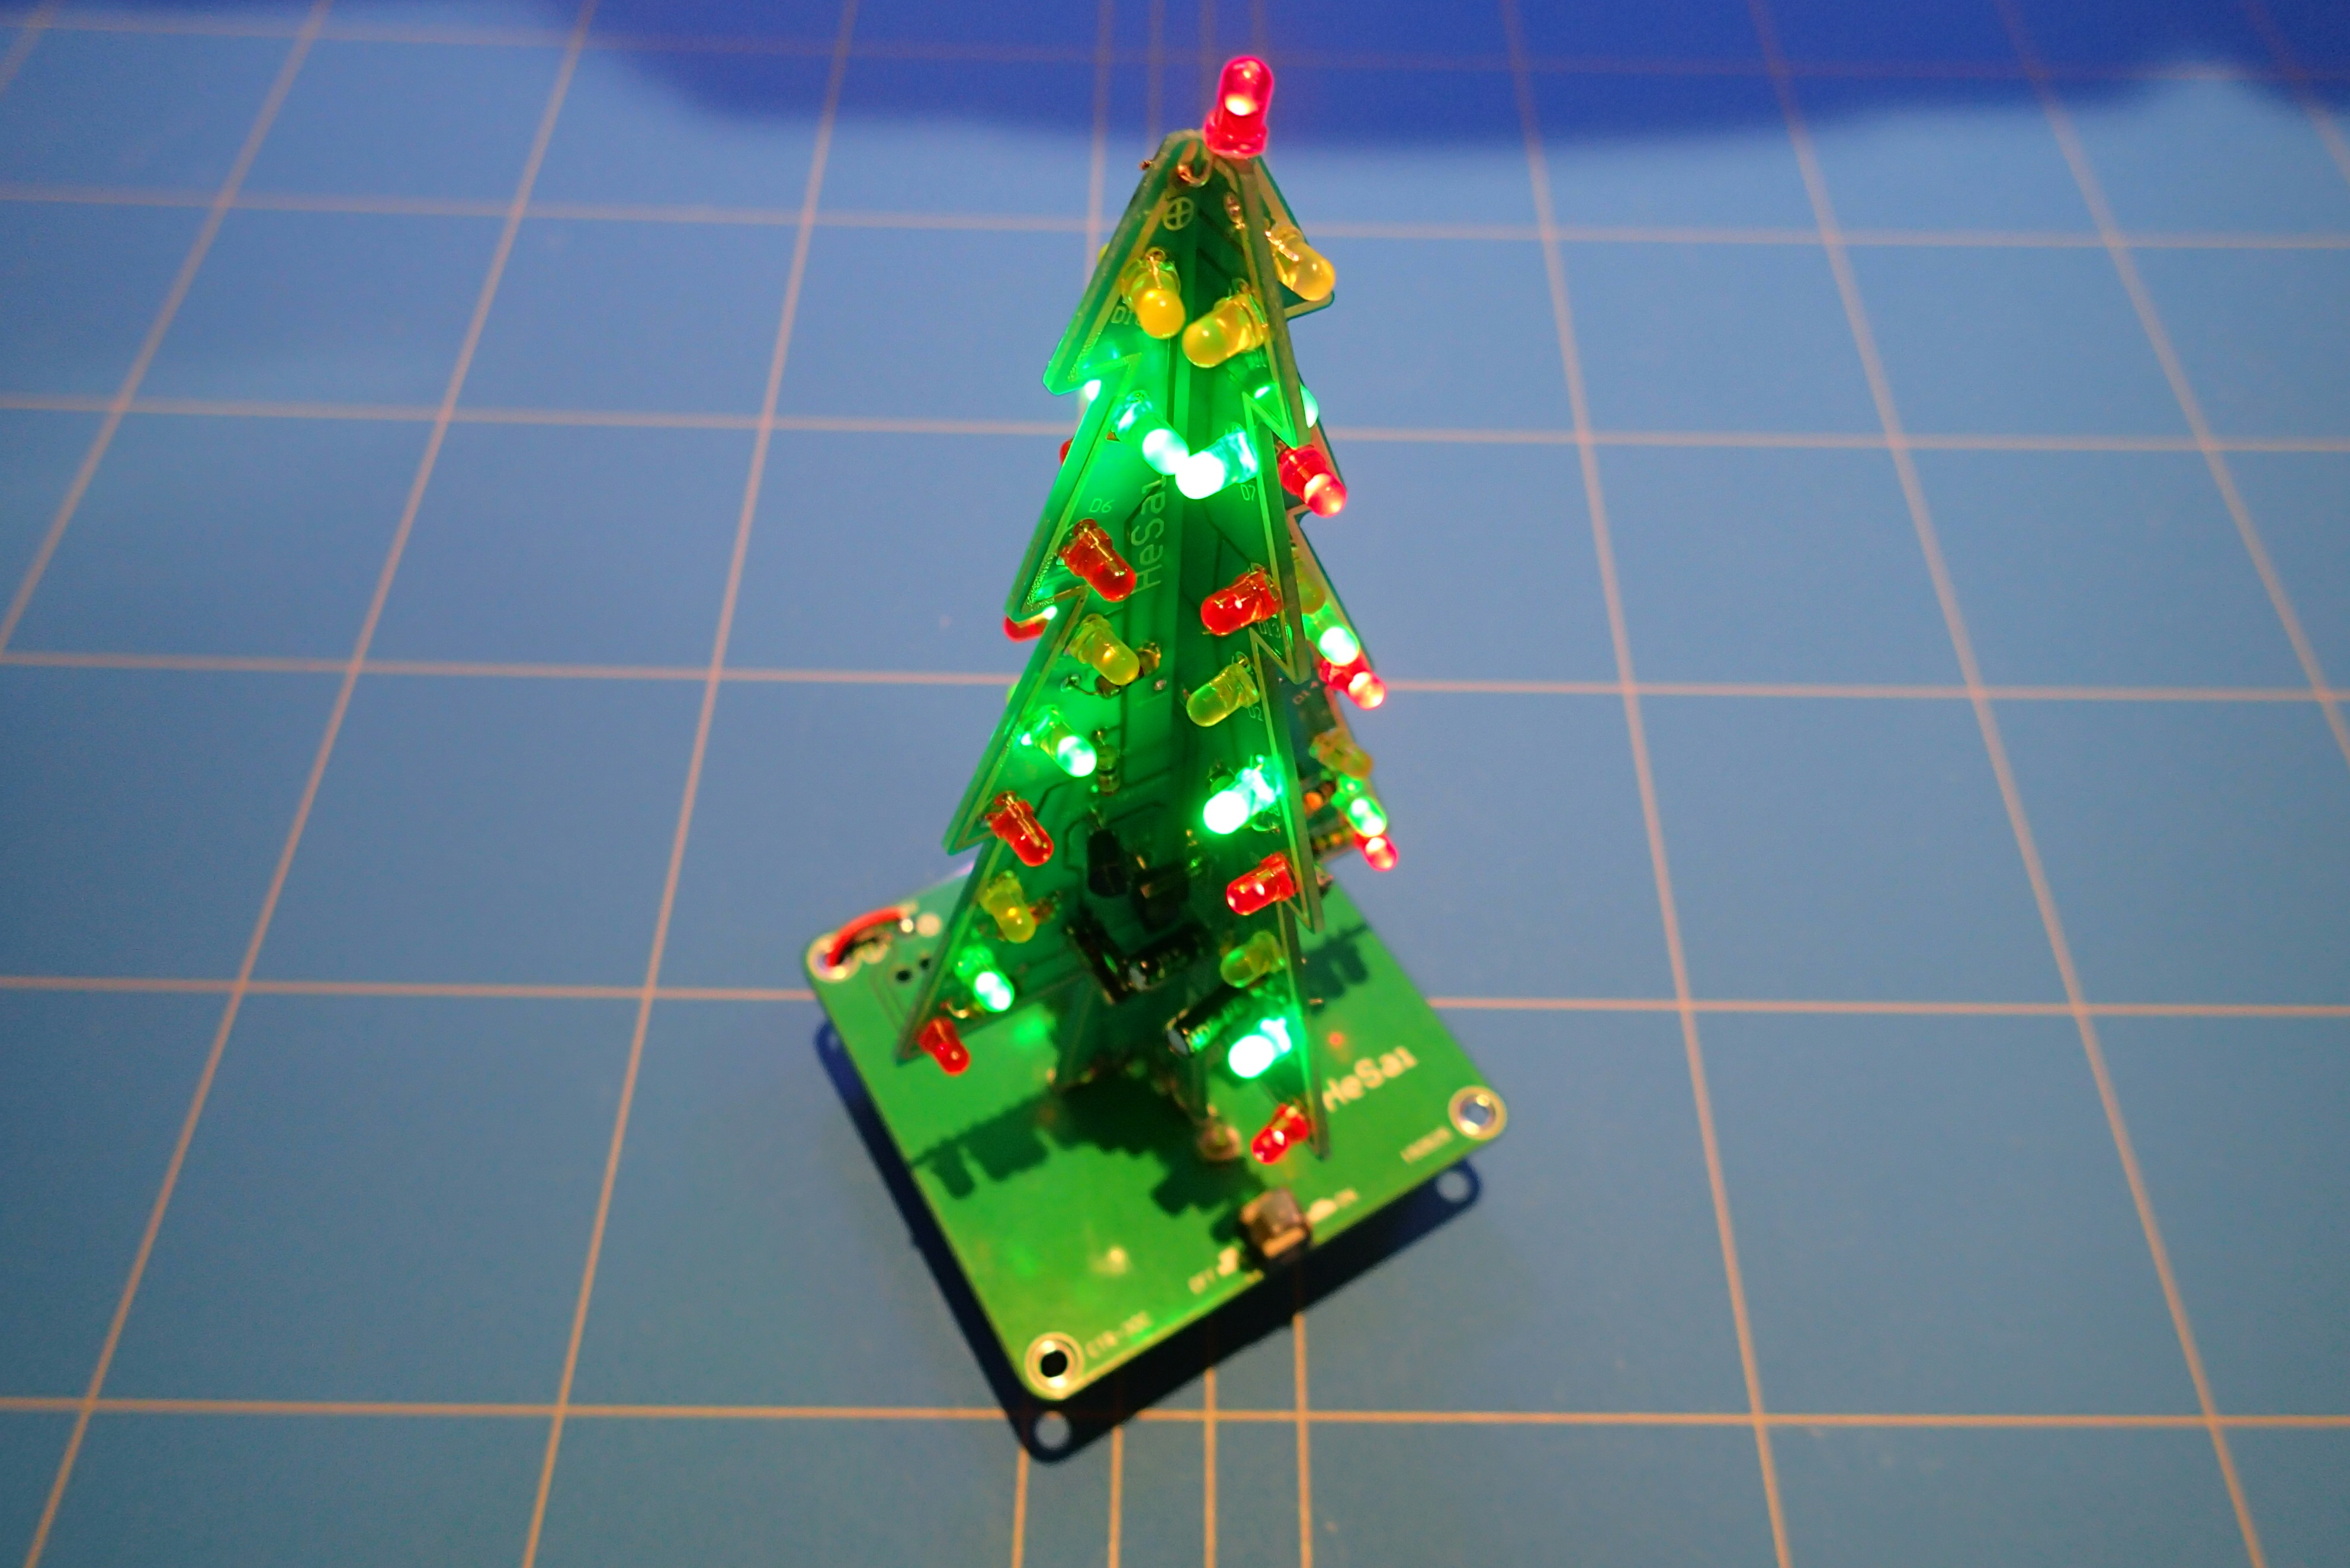
If you want to save your valuable space and don’t want to put a real Xmas tree in your room, there is always an option to make one out of PCB and LEDs and during the process learn something about electronics.
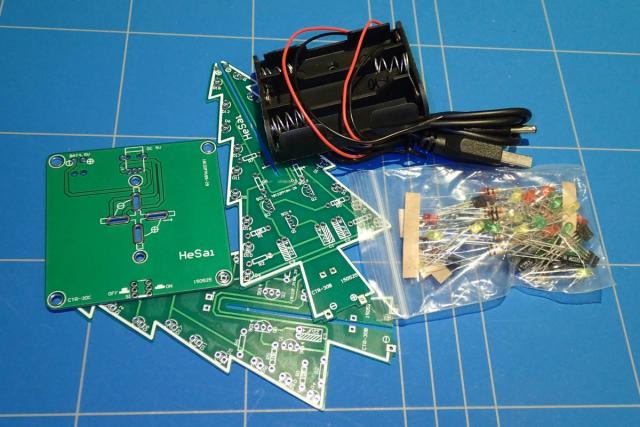
Like this small kit that includes the PCBs, components, battery connector and a USB charging cable. You can get this 3D Xmas Tree - PCB Board Module for a couple of euros in Chinese online webshops.
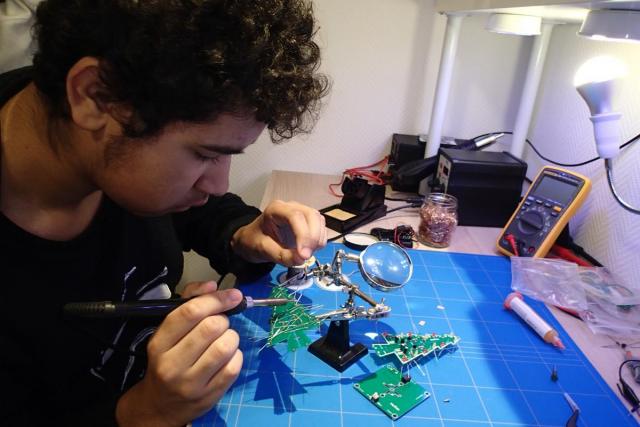
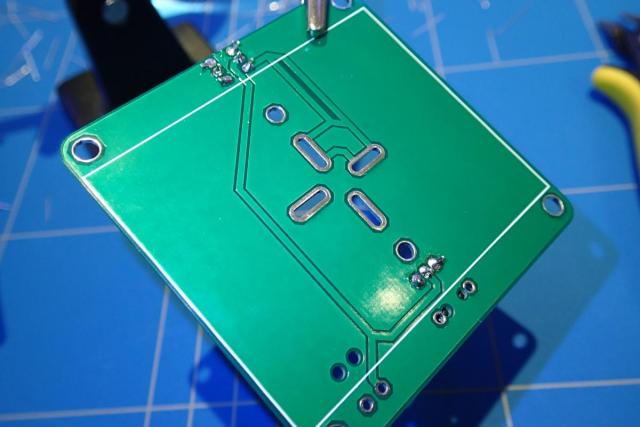
To start you need to put all the parts on the PCB board. I always bend the parts on the back so they don't fall out.
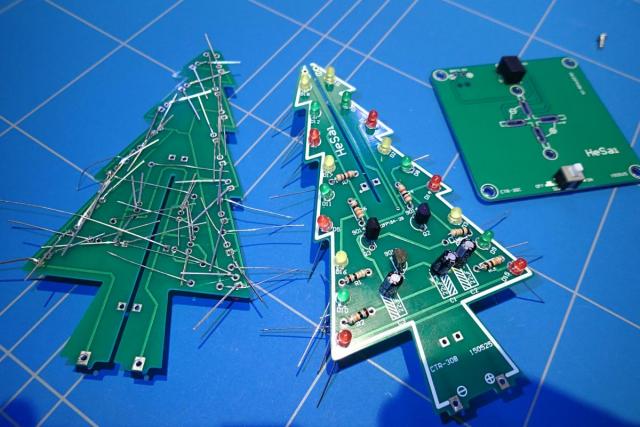
Then it is time to start the soldering process. You can you always use a third helping hand to help you to hold the PCBs.

Then you can ask your son if he want to learn to solder and let him do it.
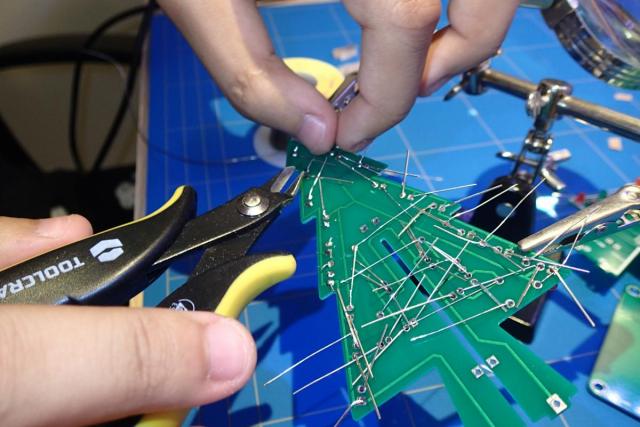
After you solder the parts to the PCBs you need to cut the wires. We have used a flat side wire cutter.
There are two parts of the PCB tree...
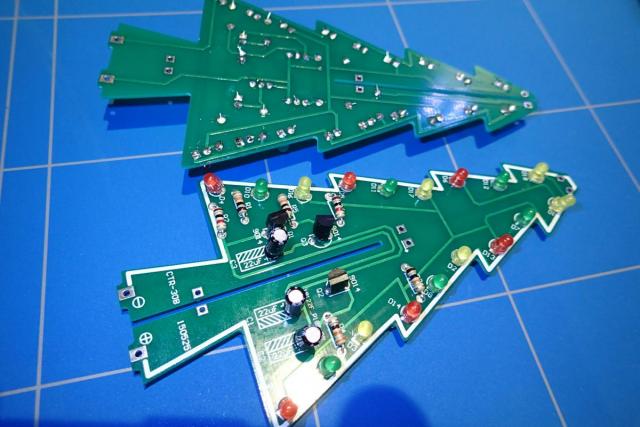
.. that you need to slide into one another.
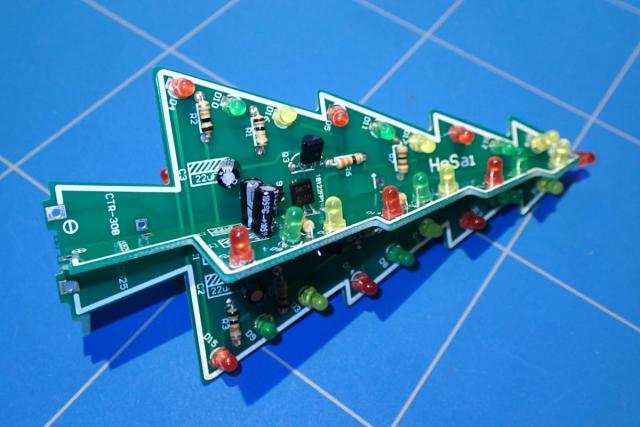
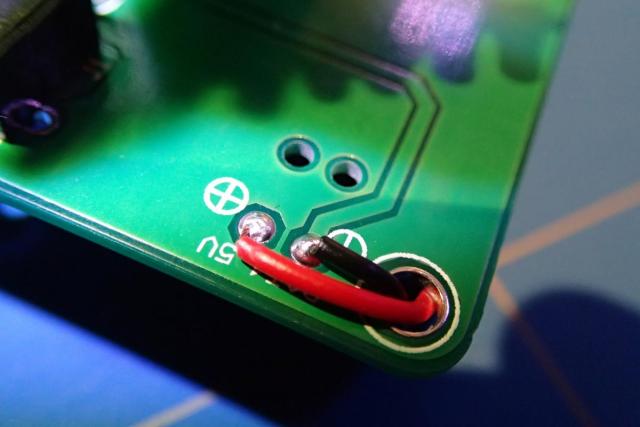
In the end you need to solder the PCB free to the base. Watch the polarity!
Then solder the wires from the battery holder to it.
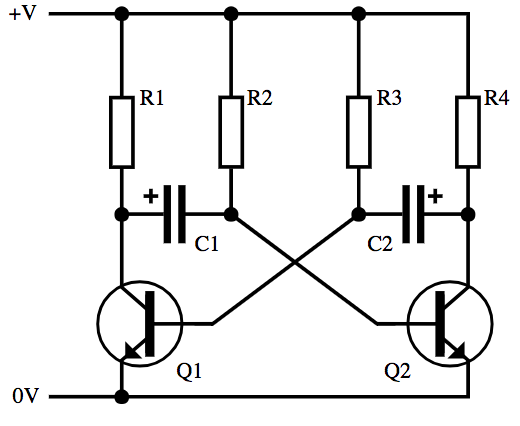
The flashing of the LEDs is based on an astable multivibrator circuit shown below. A very good step by step explanation on how this circuit exactly works can be found on this website.