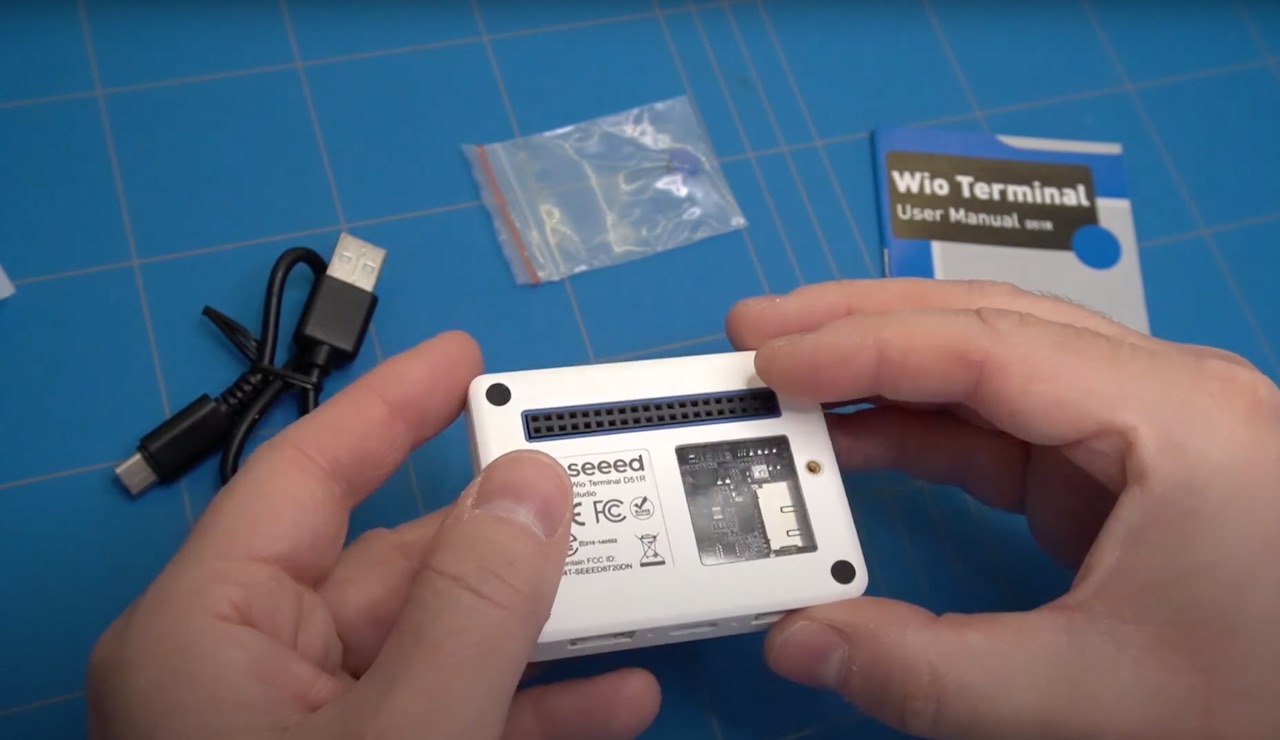
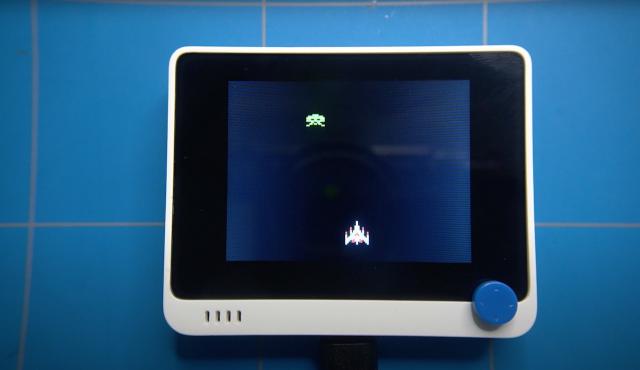
Seeed Studio has sent me this cool device called the Wio Terminal. It is compatible with Arduino and Micropython and it's heart is the SAM D51 microcontroller running at 120 MHz. It is equipped with a 2.4” LCD Screen, onboard IMU, Microphone, Buzzer, microSD card slot, Light sensor, and Infrared Emitter.
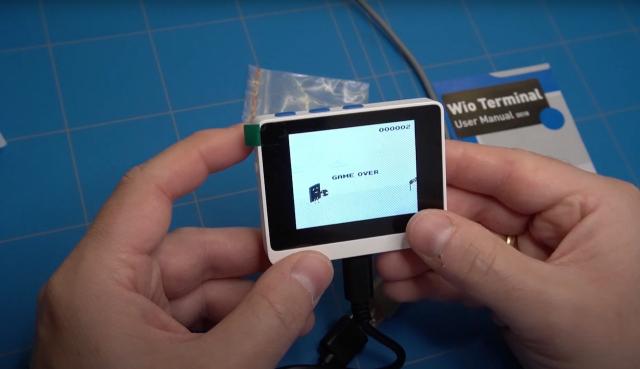
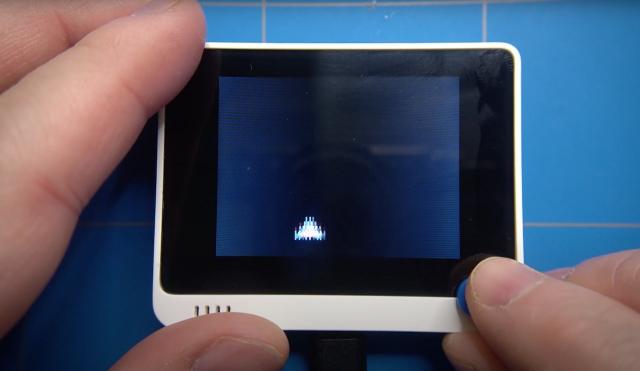
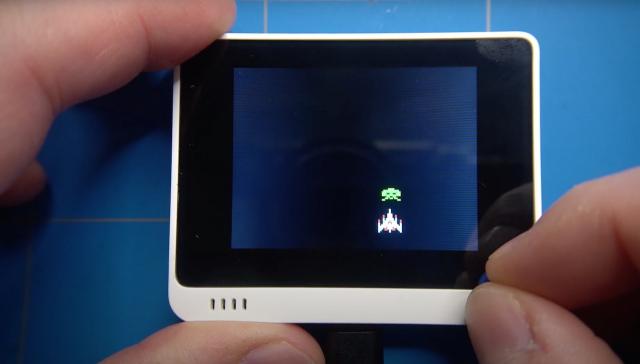
When you first plug it in, it is preloaded with this game.
It offers a lot of possibilities for development and can be used for many projects including tiny machine learning.
I was thinking about what kind of project would be best to make on this device and finally decided to make a small retro looking game with ArduPy. ArduPy is created by Seeed Studio and is a combination of Arduino and Micropython. And what it actually means is that you can convert existing Arduino libraries and use them inside your MicroPython code.
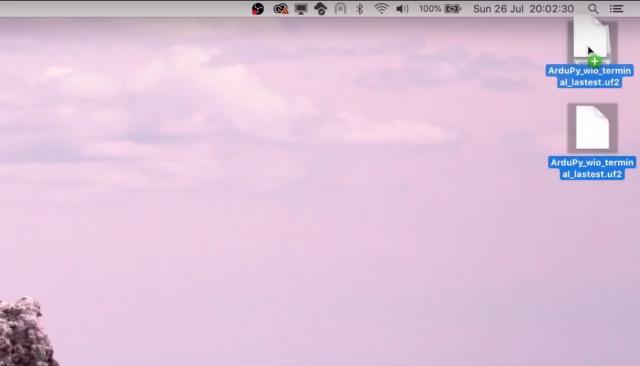
To install ArduPy we first need to download the firmware. This can be found on the seeed studio wiki pages.
Then to install it we can simply drag the firmware file onto the Arduino USB drive. I am doing this on Mac OS.
The next step is to install ardupy aip command line tool. This is done using pip command.
Make sure you have Python version 3 installed and then paste in the pip install command that we copied from the wiki pages.
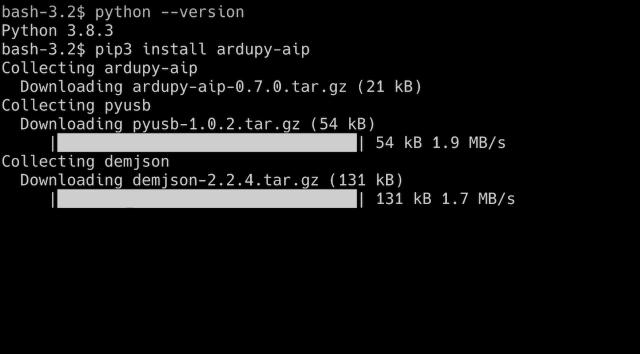
For an overview of all available aip commands you can check the ardupy wiki page.
Probably the one that you will use most is the aip shell command that accesses the REPL interface.
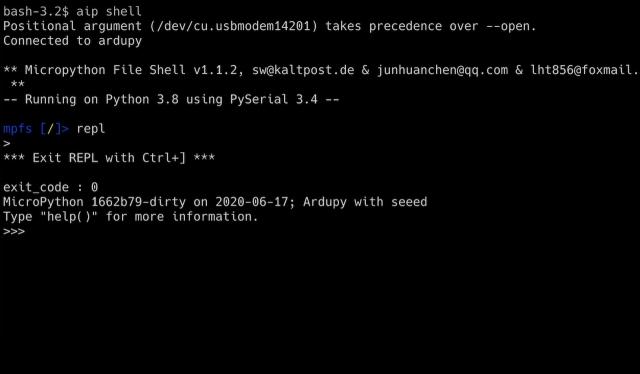
While we are here we can check what modules are available inside ArduPy.
The most interesting is the machine module. It contains all device specific functions. Like this sprite module. We will be using it extensively while creating our game.
![]()
So let's dive right in and start coding.
First we need to find a sprite for our ship. I think this galaga ship will do just fine.
![]()
Part 1 - Ship sprite
The code for this part can be found in my github repository tagged by 0.1
In order to show the ship sprite we need to import the LCD and Sprite classes from the machine module.
Then we initialize the LCD and the ship sprite objects.
Our ship will have the dimensions of 21 by 21 pixels, so we define it here where we can reference it later.
We will also upscale each pixel by a factor of 2. Let's make a variable for that.
The ship will be a one dimensional list, which we will split up into columns and rows. I am using integers to encode the colours. We need to add some rows and columns of 0's otherwise the sprite will leave a drag when it's moving.
To create the sprite we will make a function so we can also use it for other sprites.
The create sprite function from the sprite object takes 2 arguments which is the width and the height. We will pass it in together with the resize factor. So in actuality our sprite dimensions will be 42 by 42 pixels.
Then we will fill the sprite with black colour.
(45) In this line we calculate the length of the list. We could as well use the len function, but we know the dimensions of the sprite so we might as well calculate it ourselves.
Now we create 2 for loops to create the sprite from the contents of the list. For debugging purposes I am also printing the created row that will be visible inside the REPL shell.
(52)The index of the list can now be calculated from the row and column that we are looping.
Like this we can get the value from the list and set the colour. The RGB colour is defined by 16 bits. The first 5 bits are for red, then 6 bits for blue and 5 for green. We can then calculate hexadecimal values for each of the colours.
(68) Finally we can plot the pixels on the sprite canvas using the rectangle command.
To show our sprite, first we will fill the screen with black colour,
we call the create spite function using as arguments the ship sprite object, the list and x-y dimensions.
Then with the pushSprite function we can put the sprite on the screen at given coordinates.
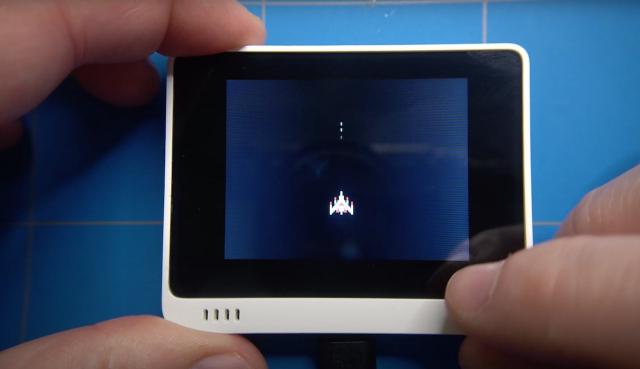
With this finished when we can save the code in the main.py file. The code will be automatically executed and it will show up like this on the screen of the Wio Terminal.
![]()
Part 2 - Ship movement
The code for this part can be found in my github repository tagged by 0.2
In order to be able to move our ship, we will need to access the switches on the device. Looking at the machine module we have 2 classes that we can use to access the input pins.
The Map class includes defines for the buttons.
Let's first import the Map and Pin classes.
This will allow us to define the 5 way switch movement for left, right, up and down. There is actually no definition for the down movement, but I have found out that it is pin number 61.
We can cut the code that we have written earlier and define a game_loop function. With the init_on_start variable we will be able to execute the initialization code inside the loop just one time.
Now we can paste back the code and adjust the indentation.
Adding the ship_movement variable will allow us to choose when we want to move our ship sprite.
Setting init_on_start variable to false will prevent executing the initialization on the second time the loop is iterated.
Here we will define the movement of our ship. Left and right will move the ship along the horizontal axis and up and down will do the same for the Y axis for vertical movement.
We will also move the pushSprite function inside the ship_movement as we want to update the position on each loop iteration.
I have noticed that when the micropython code is in a loop, it sometimes prevents me from saving the code on the Wio Terminal USB drive. For that case I have added a halt button to terminate the program.
To accomplish that we need to import the sys module which includes the exit function.
For the halt button we will use the KEY_A button, located on top of the Wio Terminal.
Inside the loop function we will check if the button has been pressed and then we call the sys.exit() function.
To finish up we need to call our game_loop function on the bottom of our ArduPy script.
We can see that the ship can move using the 5 way switch. The only issue we have now is that it is not stopping at the edges. Let's fix that now.
Part 3 - Boundries
The code for this part can be found in my github repository tagged by 0.3
Inside the ship_movement if statement we will add some limits to how far the ship can move as the screen size is 320 by 240 pixels. We also need to take into account the ship dimensions and the resize factor, which is the rf variable.
The -2 offset stands for the invisible pixels that we defined inside the list.
After saving the file we can see that the ship stays within the screen boundaries.

Part 4 - Shooting ability
The code for this part can be found in my github repository tagged by 0.4
Let's now add the ability to shoot.
First we define a bullet sprite object and give it dimensions. It will be 1 pixel wide and 4 pixels in height.
To fire we will define KEY_C. And for the bullet sprite we will just use 2 pixels, the other pixels we leave as black. The zero's on the border is to prevent a drag of the sprite. I was not able to create a sprite that is truly transparent and can be defined without these black borders. If you know how to do this, please leave a comment.
Inside our init if statement we create the sprite. We only need to do this once as we will be only changing the coordinates of the bullet.
The initial position of the bullet will be just above and in the middle of the ship.
We will also add a bullet movement variable and a variable to sense when the fire button is released. This will prevent autofire.
So when the button is pressed and we are not firing and the button was previously released we will set initial coordinates to the bullet, set the firing variable to true and set the release C button variable to false.
if the fire button is unpressed (state 1) we set the release button variable to true.
If the bullet is in the firing state we will first draw the sprite on it's coordinates.
And when the bullet is moving we will change the y coordinate so it will look as it is advancing on the screen.
Finally... when the bullet leaves the screen we set firing status to false.
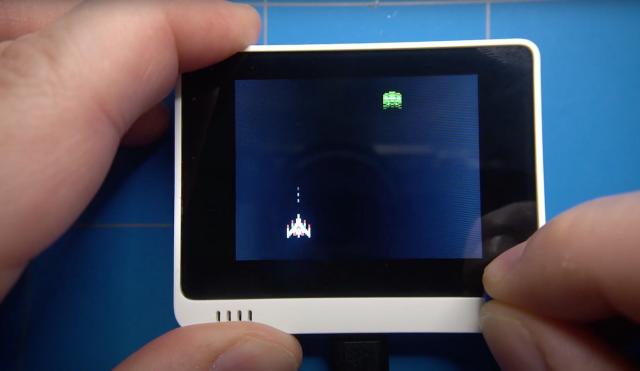
It seems to be working. We can shoot a missile and retrigger it every time it leaves the screen.
Part 5 - Enemy sprite
The code for this part can be found in my github repository tagged by 0.5
Let's add an enemy sprite. Just like with the ship we will create a global variable and define dimensions of the sprite. We will base the enemy ship on the space invaders sprite. The sprite has just one colour. So the green pixel list elements will get a 5.
![]()
We will create the sprite inside the init block, next to the others, and give the ship initial position to test.
The enemy will also get a movement state variable and just like the ship sprite we will use the pushSprite function to display it on the screen.
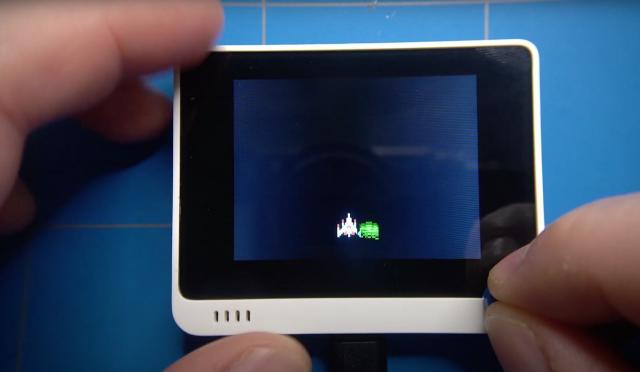
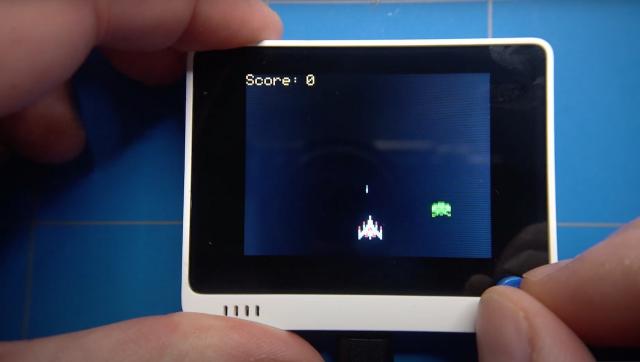
Saving the main.py file will show the enemy space invader.
Part 6 - Enemy movement
The code for this part can be found in my github repository tagged by 0.6
It would be nice if the enemy ship could move. So let's implement that now.
Inside the enemy_movement if statement we will increase the y coordinate by 1 on each loop iteration. When the enemy ship moves off screen we will respawn it again at the top, minus the resize factor of the offset sprite height.
Part 7 - Enemy random respawn
The code for this part can be found in my github repository tagged by 0.7
The enemy ship respawns every time at the same location, let's add some randomness to it.
This version of ArduPy does not have the random module included, so we shall create our own random function that is based on the timer. It is included in the time module, so first we will import it.
Inside the random function we need to multiply the milliseconds ticks by a random number and take the modulo, which is the reminder from the division of the maximum possible respawn position.
This will give more or less random horizontal location of the enemy ship.
First we change the initial position of the enemy ship, and also when it leaves the screen.
When we test it, the enemy ship does indeed appear in random locations, but we are missing something here.. there is no collision detection with the ship or the missile. Let's add that next.
Part 8 - Collisions
The code for this part can be found in my github repository tagged by 0.8
I couldn't find any sprite collision functions for ArduPy, so we will write a simple collision function. It will check if the bottom of one sprite collides with the top of another sprite.
The function will take a couple of arguments that are the coordinates and dimensions of the 2 colliding sprites.
This drawing illustrates exactly what is happening inside the function.
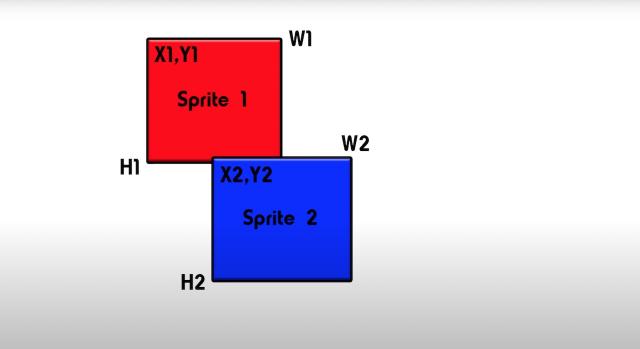
In this line we check if the coordinates collide and then we set the collision variable to true and return the value.
Inside the init block we initialize 2 collision possibilities. It is a ship with an enemy and an enemy with a bullet. We set them both to false.
We can now check for collision of enemy with the ship. When collision happens, we will set the collision_shp_with_enemy variable to true.
We will do the same check for the collision with a fired missile.
After the collision of the ship with the enemy we freeze the movement of the enemy, the ship and the bullet.
To destroy the enemy we simply fill the sprite with black colour. This can be of course extended by creating an animation of explosion, but we will keep it simple here.
We do the same to the ship and the bullet sprite.
To prevent retrigger of the collision we can raise the invisible enemy ship by 5 pixels. Otherwise we won't be able to get out of this loop.
When the missile hits the ship we will also destroy the enemy in the same way as before by filling the sprite with black colour. We have to use the pushSprite function to erase it from the screen. The same is done with the bullet sprite.
(250) Now we can reset the coordinates of the enemy ship to outside the visible area on top of the screen and bullet to the initial coordinates just before it was fired. We also set the firing state to false, which will allow us to press the fire button again.
Now we need to delete the sprite from the current position and recreate it from the list. There might be other ways to do this, but this solution worked for me.
We will also recreate the bullet sprite in the same way.
And finally we can set the collision variable of the bullet with the ship to false.
After saving we can see that we can fire at the enemy ship and it will disappear. When we crash with the enemy the game will freeze, and in our case this will mean game over.
Everything is very fast now and almost unplayable, but this will change soon.
Next, let's show the score on how many ships we have taken down.
Part 9 - Score
The code for this part can be found in my github repository tagged by 0.9
For that purpose we will first need to create a score sprite. We could also do this by using text printing functions, but this would be considerably slower.
(81) Here we are creating a function to initialize the score sprite.
The sprite will have the dimensions of 230 by 16 pixels. Then we need to fill the sprite with black colour and set the text colour to orange. With the setTextDatum function we can justify the alignment of the text. In our case 0 means top / left. Then we set the text size to 2. I found that this size will give a reasonably readable font. And finally we can write the text: Score.
To print the actual score number we will create this show_score function. It will give us some performance gain as we will not need to write the text score each time, just the count.
Again we set the text colour to orange and print the score digits.
Then we use the pushSprite function to actually show the score in the top left portion of the screen. It will include the text "score" as well because it is part of the created sprite.
(159) Inside the init part of the loop we call the initialize score sprite function and set the score count to zero.
Then inside the part where we do things after the collision with the missile we increment the score. And finally show the score. It is outside the collision code because we want to update it constantly. The reason for it, is that the incoming enemy ship sprite can erase it while falling down on the part where the score has been printed.
After we save the code, our game will be automatically started and we can see that the score is shown in orange colour.
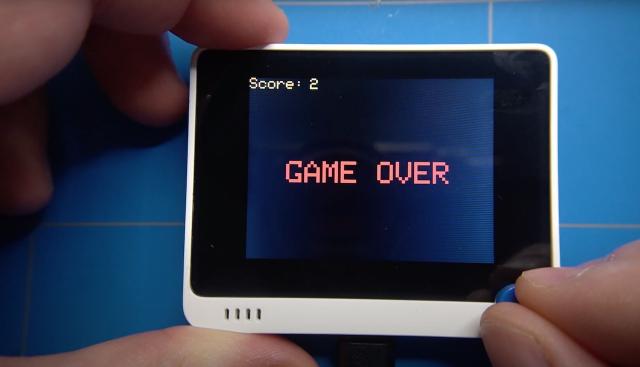
Part 10 - Game Over screen and Start
The code for this part can be found in my github repository tagged by 0.10
After our ship crashes and it's game over, we would like to be able to restart the game. To do that we will define the middle button on top of the wio terminal which is named key B as the start button.
We will also define a function that shows the game over screen. For this we will not use a sprite, but send it directly to the LCD display. Just like before we need to set the colour. This is the code for red text colour and the alignment to top left. The font size will be slightly bigger than the score.
And then we print the text "GAME OVER" at coordinates 50, 100. This is roughly in the middle of the screen.
(188) Inside the game loop init part we define "button B is released" boolean variable. In this case we set it to false, as the start button is actually pressed down when we initialize the game.
And inside the game loop we check if the start button is pressed and if it was in the released state before. Then we initialize the game and set the button_b_released boolean to back false.
We also need to make an if statement to check if the start_button is released. In that case we set the button_b_released variable to true.
When we collide with the enemy ship we will also call the game_over function to show the game over screen and also update the screen with the ship, enemy and bullet sprites.
Let's test if it is working. When we crash.. there is a game over text shown.. and we can also restart the game. The start button works at any time.
Part 11 - Sound
The code for this part can be found in my github repository tagged by 0.11
An important aspect to a game is sound. Unfortunately we are a bit limited here as I could not find any library that could play sounds and handle interrupts. So we will need to trigger the buzzer inside the wio terminal ourselves.
(35) First we need to initialize the buzzer pin as output
(84) Then we will create a make sound function that will work together with the delay global variable.
When the tone variable is higher, the generated pitch will be lower as we will delay the toggle of the buzzer at a slower frequency using the delay variable counter.
When the game is over we can create a small sound effect by looping the sound delay in the range of 100 to 400 and we will delay that with an additional loop in the range from 0 to 100.
After the enemy passes the end of the screen we will make a similar sound, just a bit shorter. The difference with this sound is that we are continuing the animation and in the other cases the game was freezing for the time of duration of the sound.
When we fire a missile there will be a short beeping sound.
And after the destruction of the enemy ship there will be a sound as well.
Part 12 - Additional rules and start screen
The code for this part can be found in my github repository tagged by 0.12
To finish up we will and additional rules to the game and a start screen.
To start we will only allow 3 enemy ships to pass. When that limit is reached the game will be over as well.
(114) Inside the init score sprite we will add an extra text called "Enemy".
The show_score function will get an extra parameter, which holds how many times an enemy ship has passed.
We will show that count in red colour. We are subtracting here that number from 3, so we will see the amount of times that the enemy ship is allowed to pass. Otherwise we will show zero.
Inside the init part of the loop we will initialize the variable to 0.
Another addition that we will make is the speed at which the space invader is flying. For that case we will need to initialize 2 variables. enemy_speed obviously indicates the speed and the step_skip is a supporting variable.
Inside the enemy_movement part we will check if the enemy_speed is larger than the step_skip variable. Only then we will advance the space invader one pixel down. We will also increment the step_skip variable.
Let's also increment the enemy_passed variable in this part of the code. This will happen when the enemy Y-coordinate is larger than 240, which is the height of the screen.
(298) We must add an extra check to when the game will be ended. This is when the enemy has passed 3 times.
To prevent retriggering of this if statement we will change this variable here to -1.
When the score increases by 5, we will decrease the enemy_speed variable, which will make the space invader fly faster.
And we must not forget to include the enemy_passed variable to the show_score function.
Finally we will add the start screen. This is before the game_loop is executed.
We fill the screen with black colour
Then we will create a loop that will exit when the start button is pressed.
And in the middle of the screen we will print the amazing title of our game in a large font in green.
Below we show the text PRESS START.
And we are done.
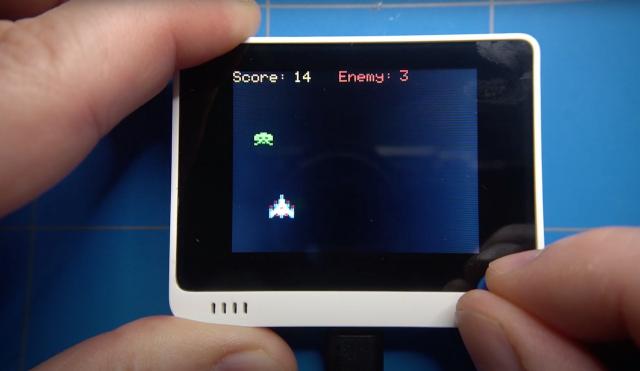
Let's test our finished game.
We see our new text enemy with the count, and the space invader is moving slowly. After score of 5 the speed increases a bit, and at 10 as well. At a score of 15 we are at maximum speed . We have to let the enemy ship pass. This decreases the enemy count by one.
And after the 3rd ship passes, it's game over.
As you can see, creating a game on the Wio Terminal is very easy. I hope that this small tutorial inspired you a bit to create your own games. The link to the code is on my github repository and you are free to make your own changes to the game. This is the link to the Wio Terminal on the Seeed Studio website.